/30
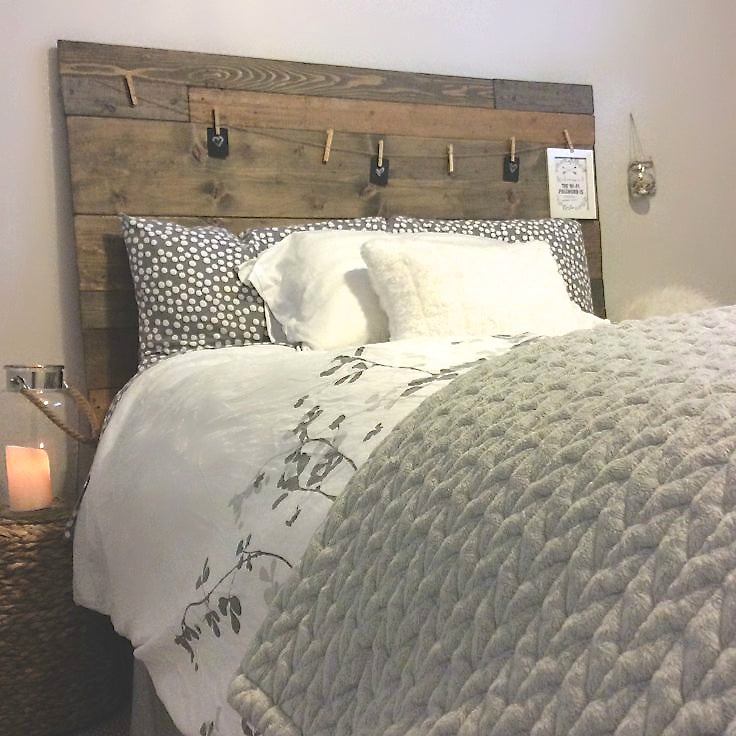
DIY | Reclaimed Wood Headboard

A few years ago, we had a surprise out of town guest coming to stay with us. This isn't a big deal if you're all prepared and your guest room is functional, but for us at that point in our lives, our guest room was the kind of room we put things we didn't want to see anymore... (hello Christmas decorations!)
Our guest room was painted a deep red/brown colour *shutter* and all we had was a mattress! I told my husband we'd need to quickly get it together, but of course he thought it was just fine as it was. All I could think is... ummm have you seen it?! In my mind there were only two choices: 1) tell our very important guest no, or 2) make it cute! Obviously option two was the best and we had less than a weekend to do it.
Usually in these kinds of circumstances I know my mom gets it. She's handy with tools and is resourceful. She told me I should get to painting and she'd start a headboard. I browsed Pinterest to show her the general look I was going for and off we went!
We did this on a minimal budget, (under $20 actually!) most of the supplies we had laying around. The end result was amazing and it's now become something that whenever people stay over they ask about. The guest room has easily become one of my favourite spaces in our home!

{ SUPPLIES }
- A pallet and old wood laying around
- Nails & hammer
- Wood stain & wax
- Electric hand sander
- Skill saw
{ HOW TO }
Step 1 - gather up some wood! We grabbed an old pallet, some wood that was laying around outside for that seasoned/rustic look as well as purchased two pieces of wood for the "legs."
Step 2- take apart the pallet. Pallets are awesome because they'll have nail marks, scratches, knots and all sorts of character.
Step 3- pick your desired headboard size and cut your wood to fit.
Step 4- sand all the boards so they are smooth (on the side that will face forward), and then lay them out on the floor so you can pick your desired arrangement.
Step 5- smack around your new wood so it looks old. Use a hammer, or some nails to get some marks and "character" into it.
Step 6- Stain all the wood using a wood stain of your choice. We choice to make ours lighter and darker to add a bit of depth to it. Personally I love things less "perfect" looking and more organic. Add wax after the stain has dried.
Step 7- Turn the wood over and attach two pieces of wood to the back of it to hold it together and lift it off the floor.


Give it a try! And if you do... make sure to hit twitter, or instagram and show us how it turned out. Are you currently working on any fun home reno or diy projects? Let me know in the comments below I'm always looking for more great ideas. Thanks for stopping by!


![]()
![]()
![]()
![]()


